Site Navigation
Top Level Navigation
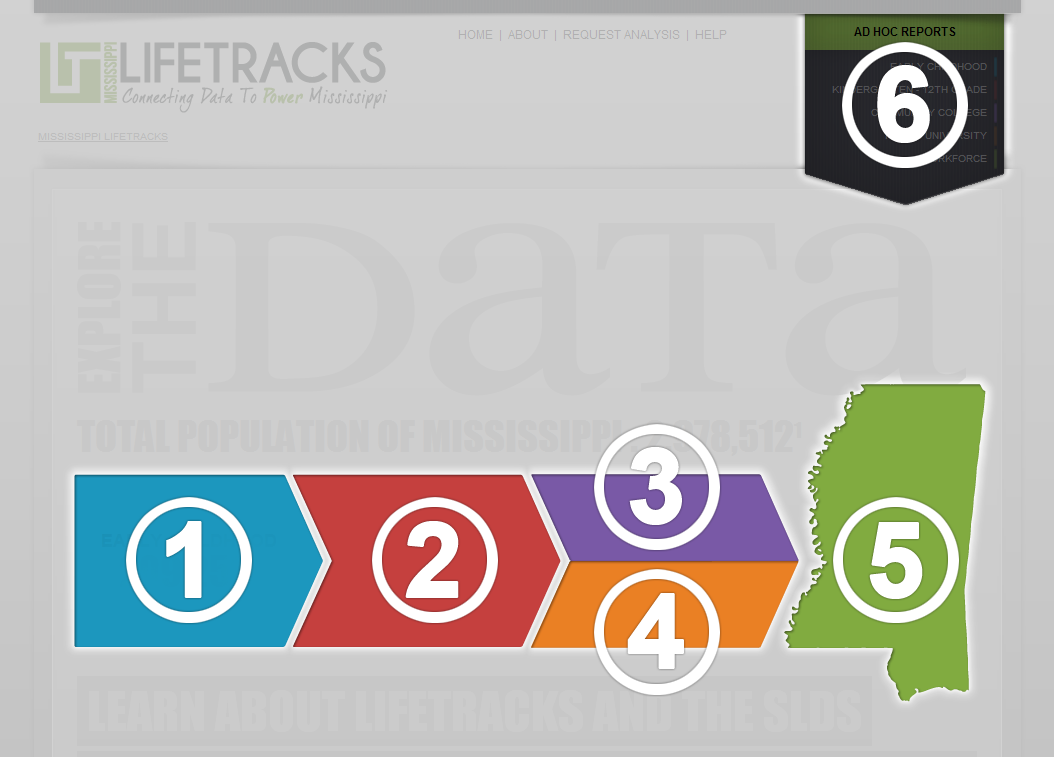
The LIFETRACKS home page presents links to the five major categories of
reports available from the application.
Clicking on the areas labeled

through

will
direct you to a list of available reports in the selected category.
Page header navigation

is present at all times while using the application and provides direct
access to any of the 5 main categories, as well as a list of all available
Ad Hoc Reports.
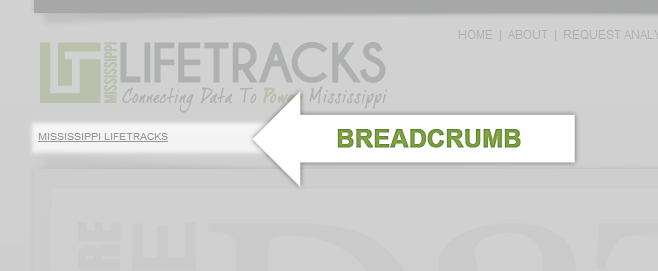
Breadcrumb
Throughout the application breadcrumb navigation is available at the top
of the page just below the LIFETRACKS logo. Breadcrumb links allow you to
retrace your through pages you have visited.
Running Reports
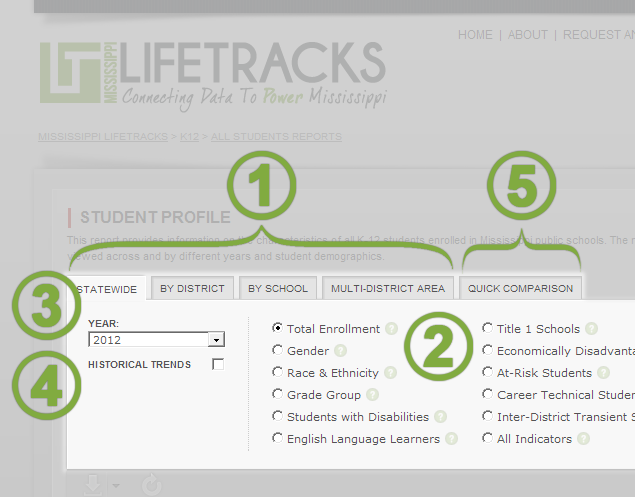
- SELECT
AN AREA
- Statewide - This view presents cumulative or average numbers
across all districts or institutions in the state.
- By District - For categories where this selection is available,
this view presents numbers for a selected district. You can select a
district from a dropdown list or by clicking on a map of the state.
- By School - For categories where this selection is available,
this view presents numbers for a selected school or institution. First,
select a district from a dropdown menu. A list of schools in the selected
district is presented. Select a school from the list in order to view the
report.
- Multi-District Area - For categories where this selection is
available, custom regions can be created by selecting any number of
districts. Select districts from a check list of by clicking on a map of the
state. Selected districts are highlighted. When you have made your
selection, click "Run Report."
 CHOOSE
AN INDICATOR
CHOOSE
AN INDICATOR SELECT
A YEAR - A dropdown list displays the available years for the selected
report. Some indicators require multiple years for calculation, so the
report view may not be available for every year.
SELECT
A YEAR - A dropdown list displays the available years for the selected
report. Some indicators require multiple years for calculation, so the
report view may not be available for every year. VIEW
HISTORICAL TRENDS - Check this box to view the selected indicator across
all of the years available.
VIEW
HISTORICAL TRENDS - Check this box to view the selected indicator across
all of the years available. QUICK
COMPARISON - For categories where this selection is available, compare
two or more schools or districts in a table displaying all of the indicators
for the selected report. First, choose whether to compare districts or
schools.
QUICK
COMPARISON - For categories where this selection is available, compare
two or more schools or districts in a table displaying all of the indicators
for the selected report. First, choose whether to compare districts or
schools.
- Compare Districts - Select the "Compare Districts" radio button.
Use the check list of the map of the state to select two or more districts
to compare. Click "Run Report."
- Compare Schools - Select the "Compare Schools" radio button.
Click on a district in the list or on the map of the state to expand the
entry and view the list of schools in the district. Use the check list of
select two or more schools to compare. Click "Run Report."
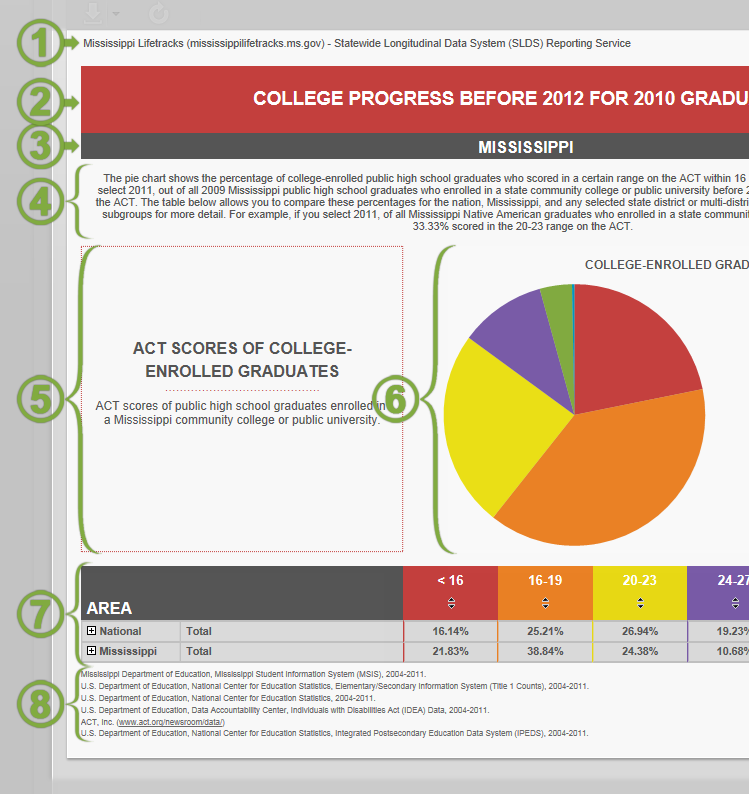
Viewing Reports
-
HEADER
- Report source, including link to Mississippi LIFETRACKS website and the date the
report was created.
-
REPORT TITLE
- A descriptive name for the subject and the year or years being reported on.
-
AREA/INSTITUTION
- This is the geographic area or the specific institution containing the population
being reported on.
-
REPORT DESCRIPTION
- This text explains how to read the information included in the selected report.
-
INDICATOR BOX
- Indicator name, description, and value.
-
CHART -
When applicable, information is displayed as a chart.
-
 SUBGROUP TABLE
- The indicator value for the selected area, as well as for the state and the nation
where applicable, is further broken down by specific subgroups. Refer to the Report
Description above for an explanation of how to read the table for the selected indicator.
SUBGROUP TABLE
- The indicator value for the selected area, as well as for the state and the nation
where applicable, is further broken down by specific subgroups. Refer to the Report
Description above for an explanation of how to read the table for the selected indicator.
-
 DATA SOURCES
- The list of data sources used in the selected report are displayed here.
DATA SOURCES
- The list of data sources used in the selected report are displayed here.
Exporting and Printing Reports
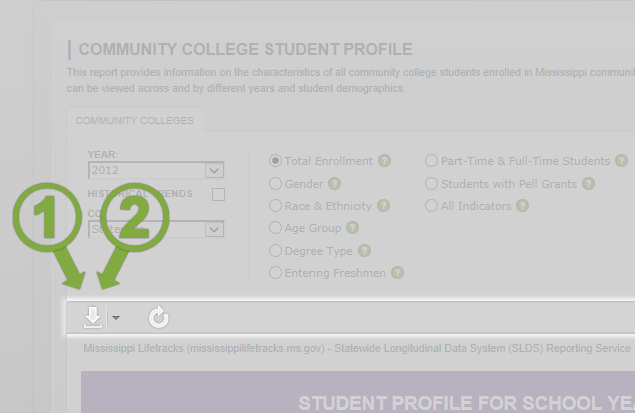
-
EXPORT FILE
- Select a file type (XML, CSV, MHTML, Excel, TIFF, Word) and download.
-
PRINT REPORT
- Click the "Export File" icon and select file type PDF. Your browser will
ask if you wish to open or save the file. Select "Open." With the file opened, you
may print the report as you would any other PDF.
Authorized Access Log In
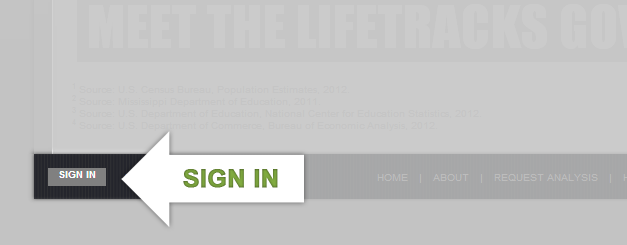
Authorized users must log into the system to view restricted-access reports.
Click the "
SIGN IN" button in the lower left of the page. You will be prompted
to enter a user ID and password.
Once you have logged in, the restricted-access reports that you are authorized to
view will now be available in your list of reports.
Requesting An Account
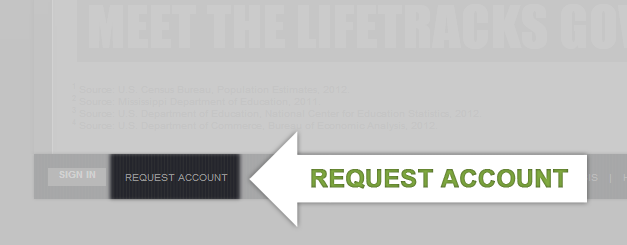
To request a user account, click on the "
REQUEST ACCOUNT" link next to the
"Sign In" button.
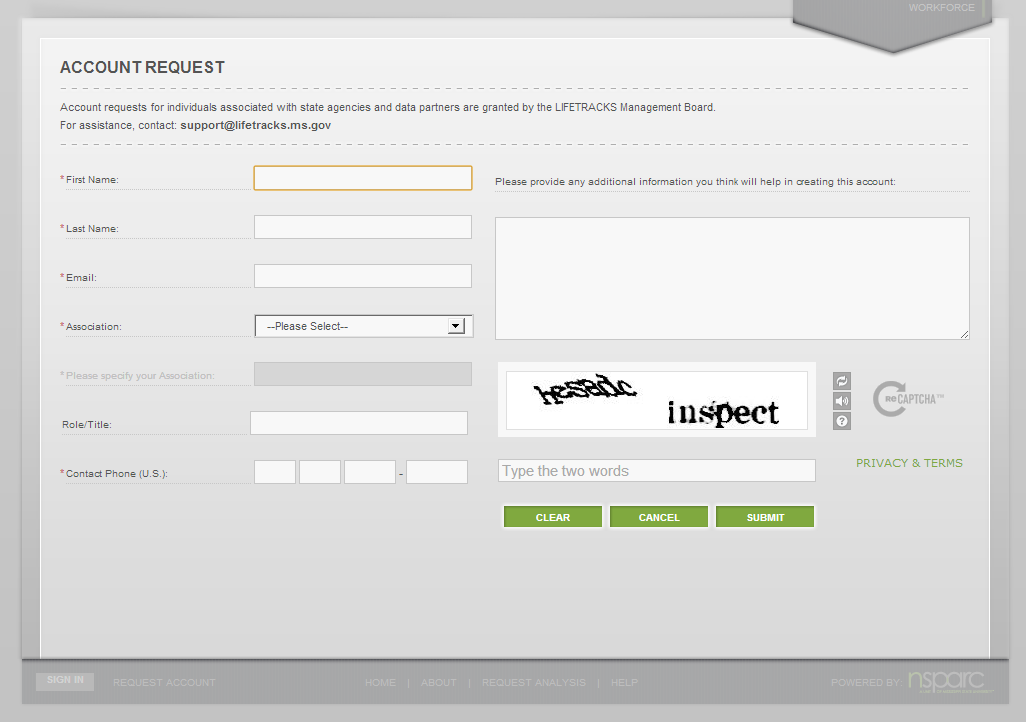
Enter your contact information, including a selection of an "Association," to aid
the LIFETRACKS administrator in directing your request to the proper state agency
administrator.
Once your request has been reviewed you will receive an email asking you to confirm
your new account or explaining why the request was denied.